6 Best Picture Frame Crafts for Kids

In this Article
Being a parent is a blessing, but there are also so many challenges that need to be faced. Keeping kids entertained is a skill that many need to learn. One of the best ways to do this is to keep them busy with a fun but productive task that gets their creativity and imagination going. Not only can you make this on any regular day, but you can also get kids to make these during any festive season. Making photo frames is one of the simplest projects that you can get your little one involved in. It is fun and you will end up with a photo frame that is charming and gift-worthy.
Video: Easy & Creative Photo/Picture Frame Craft Ideas for Kids
Fun Photo Frame Craft Ideas for Children
Out of all the wonderful home craft ideas out there, these are the best picks for new parents who are just getting started on craft with their kids. The instructions are easy and there are no complicated steps involved. If you need a few fun and simple photo frame ideas to entertain children on the weekends or holidays, here are some crafty picture frame ideas that you can try. Make sure to help your child with cutting or anything else required, especially when handling sharp tools.
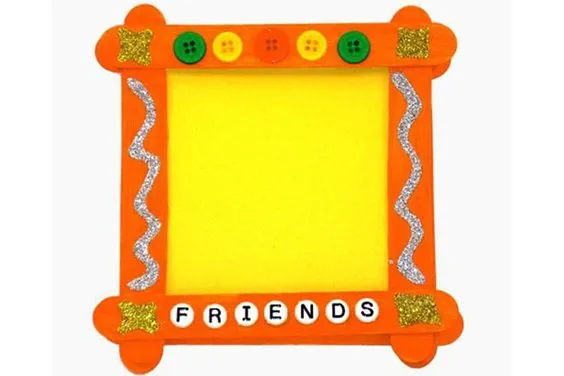
1. Basic Picture Frame
This basic photo frame is well-suited for children from six years and older. Your kids can get as creative as they want when it comes to decorating their frames. From glitter, buttons, pebbles to seashells, it really just depends on what your kids like. With this basic picture frame DIY, your little ones can enjoy a good picture frame decorating activity.
Source: Pinterest
Materials Needed:
- Cardboard
- Craft sticks- 4
- Poster paints
- Glue
- Scissors
- Paintbrushes
- Pencils
- Ruler
- Magnets or strings for the frame
- Decorative items
- Photograph
Instructions:
- Decide what shape the frame should be. It could be a square, rectangle, triangle or diamond.
- Paint the craft sticks in any colour.
- Once dried, glue the sticks in the desired shape.
- Add more decorations to the frames. Add glitter or stick any other decoration.
- Trace the outline of the frame on the cardboard and cut it out.
- Stick the cardboard on the frame.
- Stick the photo in the middle of the frame.
- Add a magnet or string and place the frame in any area of the house.
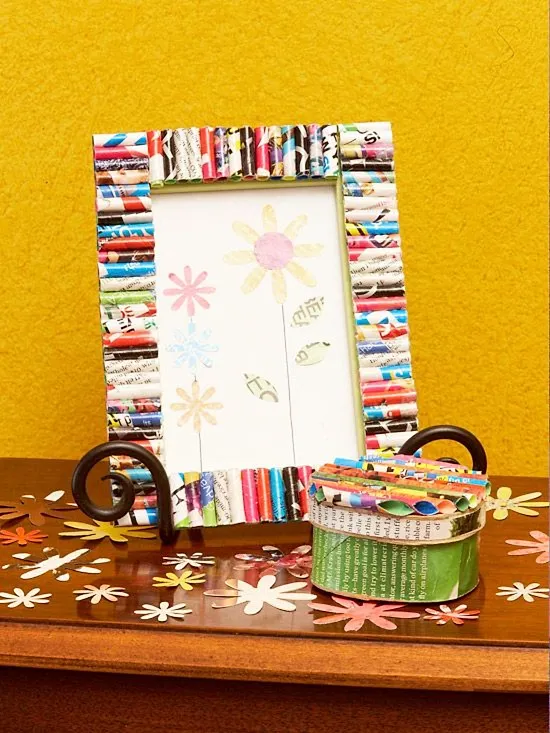
2. Recycled Magazine Frame
This project is a good way to keep the kids busy and make good use of something you would have otherwise tossed aside. Not only do you get a pretty picture frame at the end of it, but your child can be taught the importance of recycling through this activity. If you want, you can use a dollar store wooden craft frame as a base to stick the rolled-up magazine pieces onto. Just make sure to measure the length of the cut pieces accurately.
Source: Pinterest
Materials Needed:
- Scissors
- Glue
- Colourful magazine pages
- Photograph
Instructions:
- Cut out 2 by 1-inch rectangles from the colourful magazine pages.
- Next, roll these little rectangles.
- Glue the rolls together, side-by-side.
- The sides of the frame should be glued horizontally.
- The top and the bottom should be glued vertically.
- Once the frame is made, stick a picture in the middle.
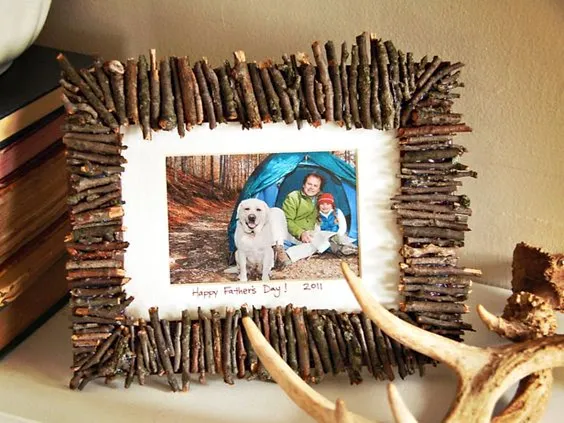
3. Twig Photo Frame
DIY picture frame crafts are a good opportunity for your children to learn to get creative and make things with their own hands, rather than buying things. Not only will this particular project teach your children to work with what they have to create something new, but this photo frame will give your home a rustic and cosy character.
Source: Pinterest
Materials Needed:
- Old and unused photo frame
- Glue
- Dried twigs
- Photograph
Instructions:
- Go out and collect some twigs.
- Ensure that the glass has been removed from the photo frame that will be recycled.
- Break the twigs to fit the sides of the frame.
- Glue the twigs on the frame. The sides should be horizontal, and the top and bottom should be vertical.
- Wait for the glue to dry before you put the picture in.
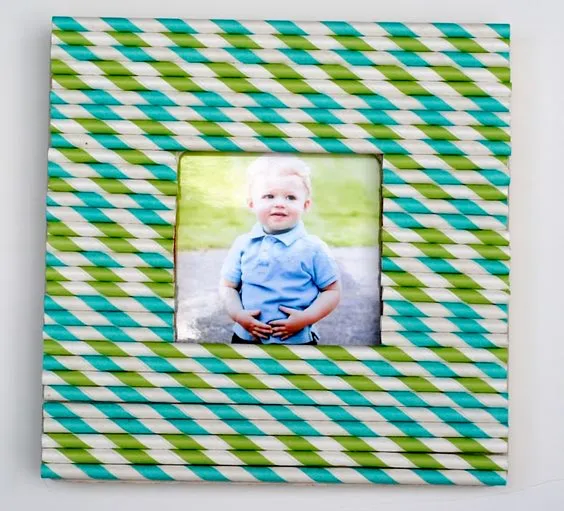
4. Straw Frame With Stripes
One of the best things about this is that there are many different coloured striped straws to choose from. Your kids can go ahead and choose whichever one is their favourite. Another alternative is that you can use whatever straws you happen to have at home. While plastic straws can work for this project, paper straws will look much better.
Source:Pinterest
Materials Needed:
- A wooden craft picture frame
- A packet of straws
- Craft glue
- Foam brush
- Photograph
Instructions:
- Cut the straws in the correct size to fit the frame.
- The bottom part of the frame should be long, but the middle should be shorter.
- Using the foam brush, spread some of the glue all over each of the sections of the frame and carefully stick the straws.
- Make sure to only spread glue on smaller areas at a time. If you spread glue on the whole frame at once, you will need to work quickly before it dries. This can sometimes make for an untidy finished product.
- Once the glue dries, your frame is ready.
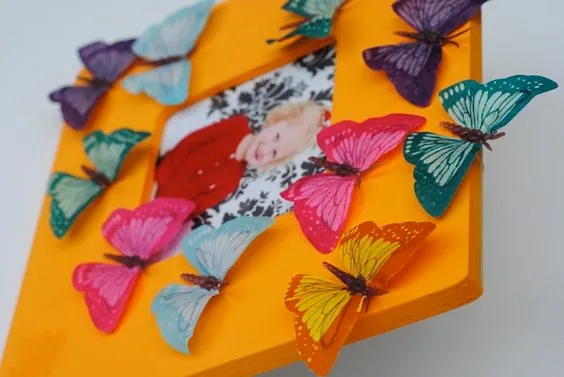
5. Butterfly Photo Frame
This is another great way to make good use of the dollar store craft frames. If your child is a fan of pretty butterflies, this frame is great and very easy to make. Even very young children can work with this simple project, but as usual, you will need to be there to lend a helping hand.
Source:Pinterest
Materials Needed:
- Dollar Store craft frames
- Dollar Store butterfly stems
- Scissors
- Craft glue
- Paint
- Paintbrush
Instructions:
- Remove the butterflies from the stems.
- Cut the back piece so that the butterfly can lie flat.
- Paint the frame in any colour.
- Next, using glue, stick the butterflies around the dried frame.
- Once the glue has dried, your butterfly frame is ready!
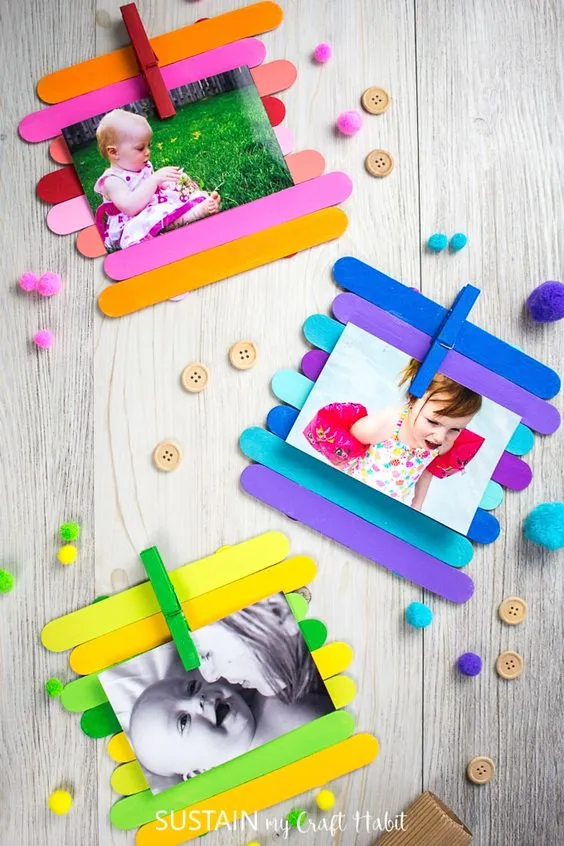
6. Popsicle Frame
This simple yet beautiful frame results in a great way to display your favourite pictures. The materials are few and easy to get. With little effort, you can put together a unique photo frame. This is a good preschool picture frame craft because there are no fancy materials or decorations. It is simple, yet charming.
Source:Pinterest
Materials Needed:
- Paints
- Wooden clothes clips
- Wooden craft sticks- jumbo size
- Craft glue that dries clear
- Paintbrushes
Instructions:
- There are many ways to paint the wooden sticks. You can go for a rainbow colour or ombre.
- Paint the clothespin a bright colour that matches the rest of the sticks.
- In total, you should have ten painted sticks.
- Once all the sticks have dried, place eight of them side-by side-horizontally on the work surface.
- Take the remaining two and glue them vertically over the horizontally-placed sticks.
- Allow this to dry for some time.
- When it is fully dry, turn it right side up.
- Spread some glue in the middle of the clothespin.
- Place this on the top and centre of the frame. Press it down to secure it in place.
- Leave this aside to dry.
Getting crafty with kids is such a good way to spend any holiday. You don’t have to worry about bored kids when their creative little minds are busy focusing on making pretty picture frames at home. With this handy skill, your kids can not only decorate the home but also make presents for others.
Also Read:
Creative Paper Craft Ideas for Kids
Quick Newspaper Craft Ideas for Kids
Easy Origami Craft Ideas for Children


